Value of Live Streaming your Classes
On-Demand Streaming and Playback, anywhere. If an opportunity arises where a student can't make it to class, they can watch in real-time with Live Captions and not fall behind and/or rewatch the recorded class lecture(s); reinforcing their learning.
Increases Student Learning. Add supplemental PowerPoint to a scheduled class before class begins, so that students can follow along (supports accessibility) or add polling slides to your PowerPoint to check for their understanding, choose the date/time of when you'd like them available.
View on this page, add a PowerPoint to a class or register for a workshop at svsu.edu/workshops? Need help with adding a presentation or embedding polling? Get help with EchoVideo register for a training.
Table of Contents
This guide will demonstrate information on live streaming your classes, where students can attend remotely in real time with the ability to participate fully during a Live Stream.
NOTE: A Live Stream class recording maximum is four hours.
How to Live Stream using EchoVideo?
Supported Browsers: Firefox (recommended) Google Chrome, and Edge work best with EchoVideo, the latest browser versions. Safari and Internet Explorer are not supported.
EchoVideo is a system that allows instructors to live stream or record their classes, you must request an EchoVideo course before you can start live streaming or recording in the classroom. The form lets us know how you intend to use EchoVideo:
Why should I schedule/record or live stream my class?
Live streaming a lecture is identical to making a lecture recording. Both automatically begin at the scheduled class time and stop streaming and/or recording at the end of class. The live stream is recorded and available in the Classes list page for students to watch after class (as much as they need to) which can reinforce concepts that were taught. If desired, you can manage the availability of the published recording.
Before a Live Stream, you can foster student engagement by add polling slides to a PowerPoint presentation then you can hide the polls until you are ready for students to view them. This is one way to flip passive learning into active learning and have students participate fully while viewing virtually. Students can respond to polls, ask questions, participate in Q&A, take Notes (download as a study guide).
Learning from anywhere, any device
- If students have to miss class for any reason, inclement weather, illness, or other situations the class is recorded that they can access at a later time, they won't fall behind because they can access the recorded class as needed and rewatch as needed.
- If you want to control individual students being able to view the recordings, you can embed the recorded class in Canvas and assign to the individual student(s).
Classroom Recording Best Practices
The list below suggest effective and successful classroom recordings.
- Before class ensure the microphone is plugged and is facing toward you, so the recorded audio is captured properly.
- To ensure student questions are captured during class, repeat the questions so that it is captured in the recorded audio.
- Do not view private emails, student grades, etc. on the podium computer, the system will record your screen.
- Do not unplug the microphone to have a private conversation with a student, as other instructors are using the room to record their classes.
- Avoid private conversations with students before, during, and after class at the podium, it will be recorded. If this type of conversation is needed, do it in the hallway for privacy reasons.
- Recording in a room without an EchoVideo Appliance (a room without a camera)? Ensure that the podium computer is turned on, logged into, and kept on throughout the class.
- After class keep the computer on (you can log off) to allow the recording to process to the EchoVideo server.
- If you are the last class in the room, you can log off, but keep the computer on for 5-10 minutes. Do not restart the computer, when your video has processed to the EchoVideo server, you will receive an email notification letting you know your video is available.
Viewing Scheduled Live Classes
The media icons have been updated with a new theme of color and look, learn more.
A live stream class(es) will be indicated by the LIVE badge next to the title of the your scheduled Class. View a sample image below:
- A raspberry badge: Class is happening now.

- A grey badge: Class is scheduled for a future class.


How Access my Live Class
-
Click on “EchoVideo”.
-
The live class displays with a LIVE badge next to the class name if it's happening now.
Grey colored badge? The live badge displays grey when it's not active or has already happened.

-
Open the class session, by clicking on the class name to enter the classroom.
View Participants Watching a Live Class
To see who is attending the Live class, click the users button found in two locations. All instructors and participants will display in the right pane as shown in the sample image below. The number of participants is seen in the bottom of the player (limited to 100) and it will update in real-time.

Source: echo360 Support
Show or Monitor Live Stream Content
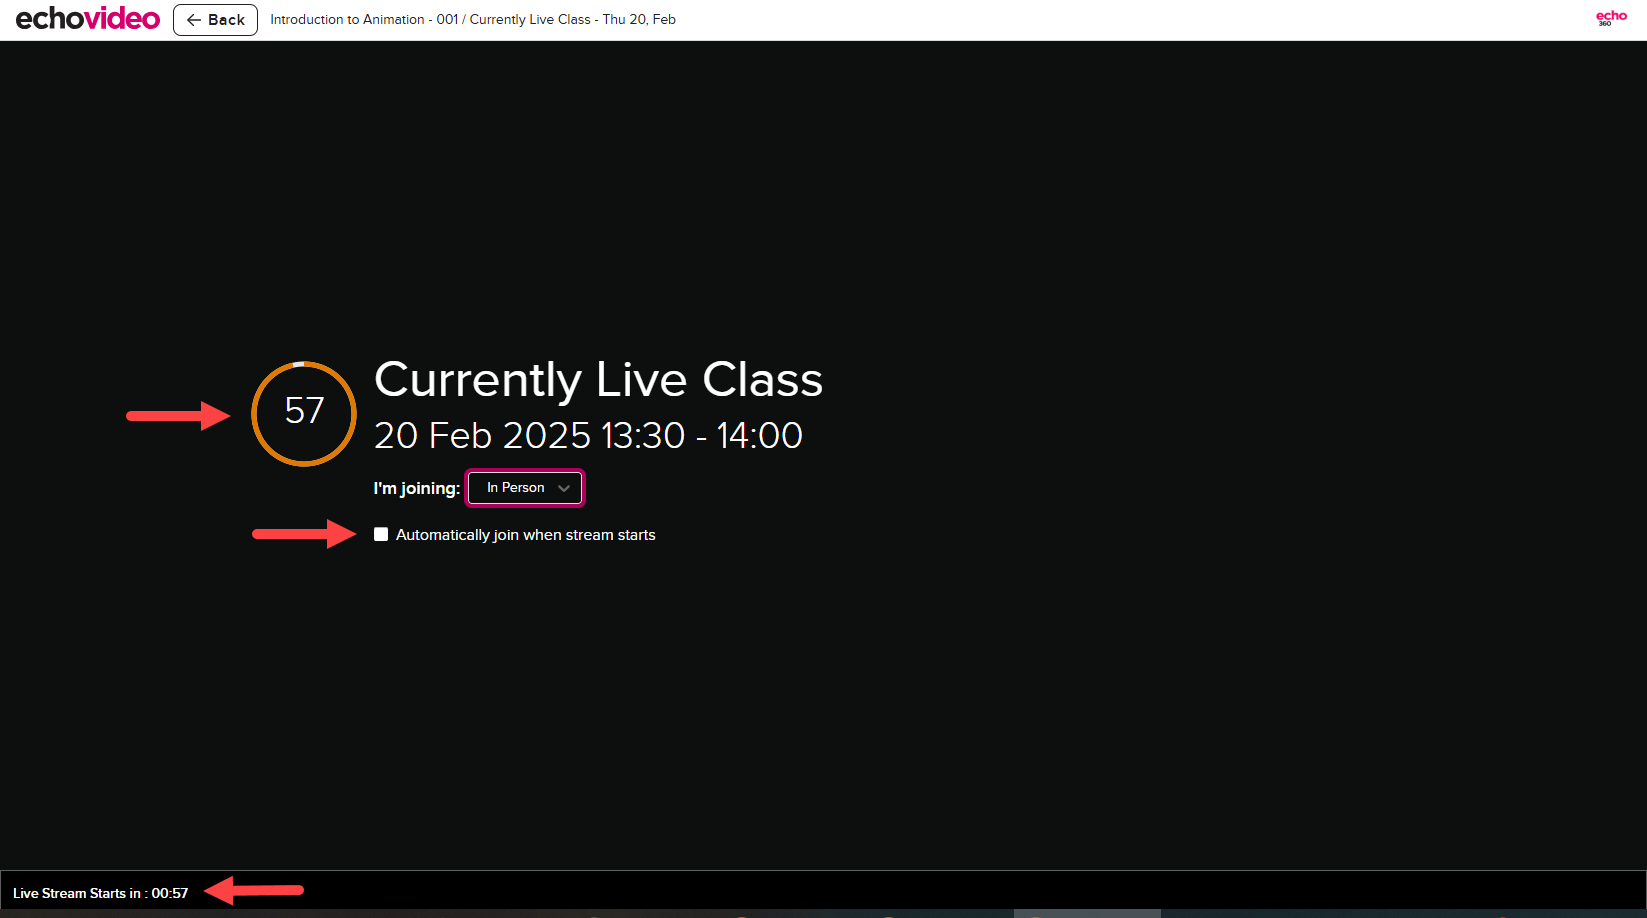
Live streams will not auto-play. You will need to open the Live Class. You will see a window that shows you how many students are viewing the live class. From the dropdown menu (see image below), select how you want to join the live class Remotely or In Person.
Helpful tip: We recommend not to monitor your class from the screen you are teaching and recording from. Instead bring a laptop to your class and plug it in via the HDMI cable. Need help and need a Live Class demo in a classroom book an appointment: Instructional Technology Help & Training.
Source: echo360 Support
How Do Students View a Live Stream?
Like monitoring your own live stream, your students must choose from the drop down menu and choose how they are joining "In-Person" or "Remotely."
Live Captioning for Live Classes
When they join the live stream they will automatically see Live Captions overlay the video player. They can choose how to view the captions through the Subtitles options via the gear icon. Which is the same for closed captions. See the image below of the user interface.

Source: echo360 Support
View Student Attendance After a Live Stream
After class, you can see unique views, the number of views, and other student participation (sample image below) within various locations within your EchoVideo course, your Library, or via the consolidated Analytics page.
Engage a Live Streamed Class with Classroom Tools
Your live streamed class provides interactive engagement tools where students can interact with their peers and the media you are presenting, some methods you can use to increase student engagement during a live stream class are listed below:
- The Classroom Toolbar allows you to interact with your students; using Q&A, Polling, view confusing content, and more.
- Use Interactive polling in a PowerPoint or a PDF then add it to your recorded/Live class session.

- Gain insight on student engagement overall, in an individual class, or by the student. You will know whether your students are succeeding, struggling, or least engaged. View responses from the Polling tab.
Physical classroom: Students can ignore watching the live stream. They should direct their attention to what the instructor is sharing on the screen/projector.
Virtual Attendance: Students watching virtually can see your screen, you teaching at the podium (if in a physical classroom), and see or hear you teach.
Using the Classroom Engagement tools: All students (in-class or virtual) can participate in the class session, ask questions, participate in the discussion, take notes, bookmark a Live Stream location, mark a segment of a live stream as being confusing, respond to polls, or view media slides.
Is there two audio and video? Students can use the Q&A feature in the Classroom player to interact with their peers and media being shared with them. The live video in EchoVideo is one way, there is not two way audio and video feedback, consider using Microsoft Teams.
Learn more about the
Active Learning Tools and Video Analytics within a EchoVideo course.
How to Conduct a Presentation with Polls During Class?
There are 5 Poll Types for a Presentation that you can present during class.
-
All class sessions in EchoVideo are accessed through Canvas or from echo360.org, click Courses and open your course.
-
Select the scheduled class and upload a presentation (PowerPoint or PDF), click the blue symbol.
-
Edit the presentation and add your polling slides.
-
Hide the polling slides (click the grey eye) until you are ready for students to participate.
-
During the presentation, unhide your polling slides, pause teaching allowing students to respond, then close the poll (click the Hand icon). You can move through to the next slide or show polling slides results during class.
-
Controlling/Showing polling slides: EchoVideo: For Instructors: Showing Polling Slide Results in Class – Support
-
Submissions: A panel (no icon) that displays the number of students that have responded and the number of them in the course.
-
Close your poll (hand icon): Allows you to close the poll, stops students from responding to the poll. You can open and reopen polls where necessary.
-
Show results (bar graph icon): Displays the number of responses. You can choose from grid or list view.
-
Show correct answer (checkmark icon) displays to all users, (they are anonymous to students).
-
Reset poll: Removes all responses and resets the poll.
-
Repeat Step 5 for each poll you are presenting during class.
-
During class, you can respond to discussion (Q&A), review confusing content via the Analytics tab.
-
After class, you can review and respond to questions asked in the Q&A tab in a course, view all polling responses in the Polling tab.
Additional Resources for Live Stream
- Real-time streaming of classes with remote or in-person attendance.
- Interaction via comments, questions, and discussion monitored live.
- Attendance list shows active viewers.
- Player controls include volume, layout (grid, split), bookmarks, subtitles, and accessibility options.
- Joining options: remotely (focus on content) or in person (focus on participation).
- Live stream syncs multiple channels and supports mobile viewing with some limitations.
EchoVideo: Viewing Live Streamed Classes – Support