OneDrive Desktop app - Getting Started
OneDrive is available for: All faculty, staff, and registered students it is part of the Microsoft 365 suite.
Before you can use Microsoft OneDrive on your university computer, you need to sign into your account and link it to your Windows PC. There are a few steps to take when setting up OneDrive for the first time. This article will walk you through the steps.
Step 1: Open up OneDrive on your PC
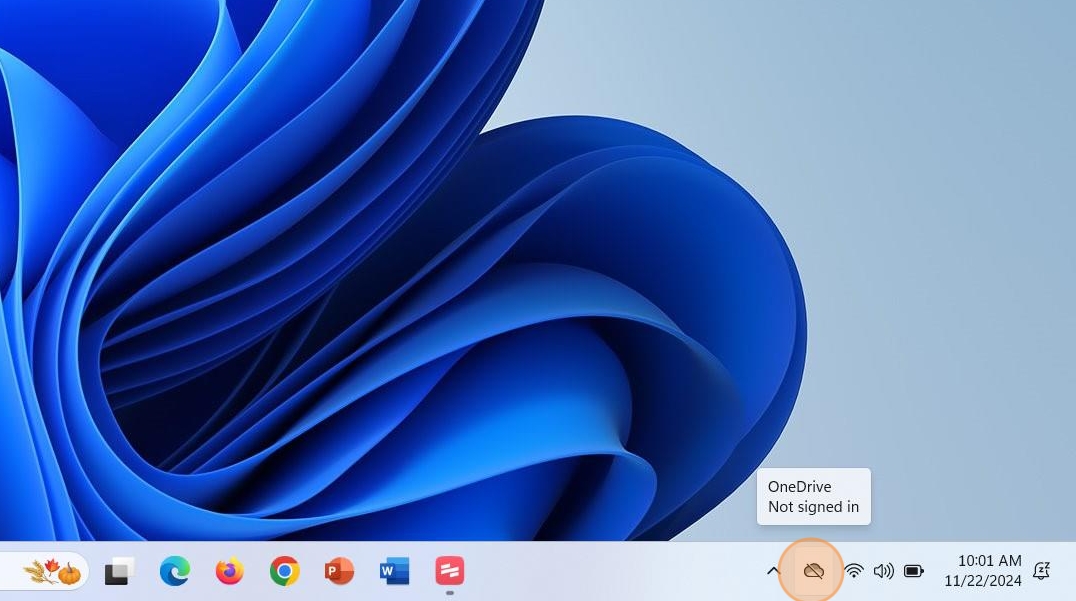
In the system tray of your Windows computer (bottom right corner of your screen), click the OneDrive icon to open it.
Note: If the cloud icon is missing, click the Windows start menu and search for OneDrive, when you see the app in the menu, click it to open it.

Step 2: Connect your OneDrive
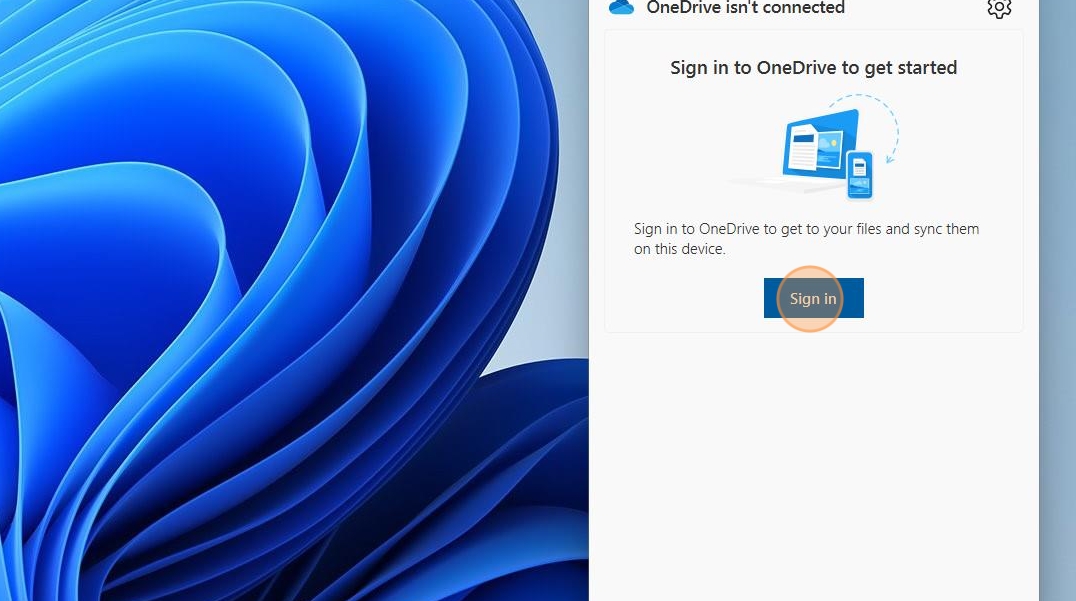
To connect OneDrive to your computer, click Sign in.

Step 3: Set up OneDrive
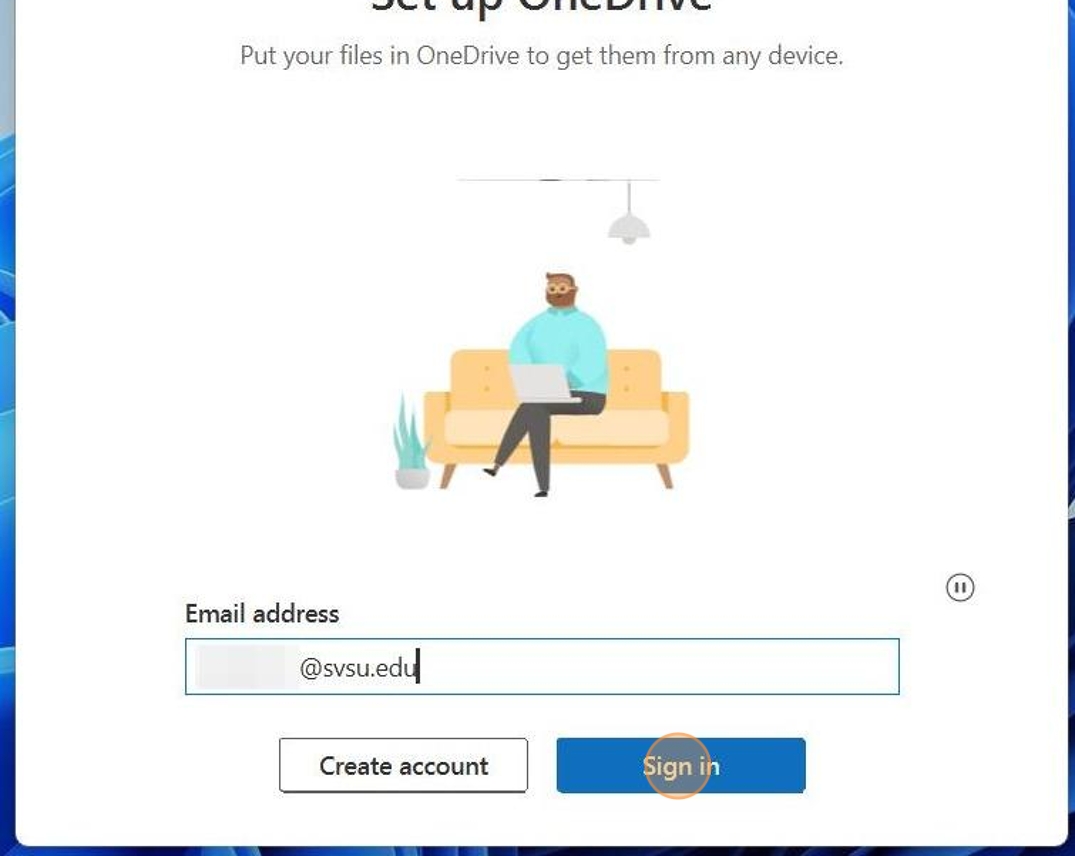
Click in the text box and type in your SVSU email address and click "Sign In."

Step 4: Your OneDrive folder location
In this window "Your OneDrive Folder" click "Next."

Step 5: Back up folders on this PC
You should always back up your main folders on your PC, the toggles of each slider Documents, Pictures, and Desktop (sample image below) files are protected even if you lose your computer or an application crashes. You will not lose your files. Click "Start backup."

Step 6: Get to know your OneDrive
Click through the get to know wizard clicking Next
at the bottom, and through the next three windows (e.g., Share Files and Folders, All your Files on Demand, Get mobile app.)

Step 7: You are finished setting up OneDrive
Your OneDrive is ready click Open my OneDrive folder. This will open up File Explorer on your screen.

Step 7: You are finished setting up OneDrive
OneDrive Files On-Demand
Work Offline: Free Up Space on your Device
With the OneDrive desktop app installed on your computer, you have shortcuts to the online files. You can mark a file or folder for offline access or online only by right clicking on it. Based on your selection, you will see a visual indicator of a blue outlined cloud for your file or folder once Files on Demand
is turned on.

Enable Files On-Demand
Note: Files on Demand is enabled during new OneDrive set up. If you are setting up on a new machine follow the steps below:
- Click the up arrow in your system tray. Click the OneDrive icon.
- Click the gear icon (upper-right). Click "Settings."
- Click the Sync and back up tab, expand the Advanced settings, and toggle on Files On-Demand.
- Click Free up disk space, then click Continue.
- File Explorer window opens automatically, all folders and files will show a blue outlined cloud indicating that they are online-only, freeing up space on your computer.
Always show OneDrive in the system tray. Right click your Windows desktop, select Personalize > Taskbar > Other system tray icons. Toggle on OneDrive. Once enabled you will see the OneDrive icon in the bottom-right of your screen.
Files On-Demand - Microsoft Support Articles